Yum. We love artichokes around here and are always so excited when we start to see them in the springtime. It seems a little early this year, since it’s still unseasonably frigid right now, but we love ’em, so we’re going for it.
Stay tuned and I’ll show you how to disembowel these suckers and get ’em fit for human consumption. You do have to wonder what the first guy to try to eat these was thinking. He must have been pretty freakin’ hungry to even attempt it; these things are a lot of work for not a lot of sustenance, but, what tasty sustenance it is!

Lop off the bottom of the artichoke. Leave maybe an inch of the stem. Remove any small, shrimpy leaves from around the stem – there are usually 4 or 5 that are inedible and just in the way…

Off with her head! Chop off the pointy top of your artichoke – maybe an inch or an inch and a half.

This is about what it should look like.

Trim off the pointy edges of each leaf with scissors or kitchen shears.


This is what your fully-prepped artichoke should look like.

Give the entire artichoke a quick rinse in some running water, if you’re finicky. Them rub down all of the cut surfaces (top, bottom and leaf tips) with half of a lemon, squeezing a bit of the juice onto the artichoke as you go.
Repeat with as many artichokes as you are planning to cook. I can only fit 4 in my largest stockpot, so that’s what we usually do. For a family dinner, we usually will each have our own artichoke as a first course, but if I’m serving a crowd, I’ll make some for everyone to share.
Place the artichokes in a very large stock pot and cover them with water. Sprinkle in a generous amount of kosher salt and squeeze the rest of the lemon juice into the water, too. Or just throw the lemon in the pot. Whichever.
Cover the pot and cook over high heat until the artichokes are soft enough that you can pull a leaf off, but not so soft that they’re falling apart. This can take up to an hour, but I’d start to check them after about 40 minutes. This is the only tricky part, but even if they’re a bit overcooked, they’re still pretty fabulous. Undercooked, however, is NOT good, so err on the side of cooking them to long, if you’re in doubt.
While they’re cooking, you can make the dipping sauces. The first sauce is VERY easy: Get a ramekin. Put about 6 Tbsp of butter in it. Melt it in the microwave. Sprinkle a little kosher salt in it if you used unsalted butter (which you should be doing, by the way, but that’s a whole other topic…)
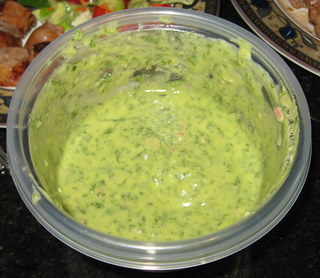
The second sauce isn’t much more difficult. Mix the following ingredients together in another small bowl or ramekin:
1/3 cup mayonnaise
1 garlic clove, minced or pressed
a sprinkle of kosher salt and freshly ground pepper
a little squeeze of fresh lemon juice (about 1 teaspoon)

When the artichokes are done, pull ’em out of the water (be careful – use BBQ tongs) and serve ’em along with the dips.

To eat ’em, pull the leaves off, one at a time, drip them in the sauce of your choice (or naked’s good, too) and use your teeth to scrape the meat off of each leaf.

Once you get to the center of the artichoke, you’ll see a fuzzy thing that looks like the inside of a flower (well…it kind of *IS* the inside of a flower.) This is called the choke.

You don’t want to eat that, so gently pull out that fuzzy choke with your fingers (if it’s cooled down enough) or a gently scrape it out with a spoon and discard it. That bottom (under the choke) part?

Well, that’s your reward for all your hard work, baby…that’s the artichoke heart. Dip it in some butter or aioli (that’s the fancy name for that mayo sauce we made earlier) and DIG IN. If you’re really disciplined (or full,) you can save it, after you eat all the leaves, and toss it into an omelet for your breakfast the next day. Yum.