
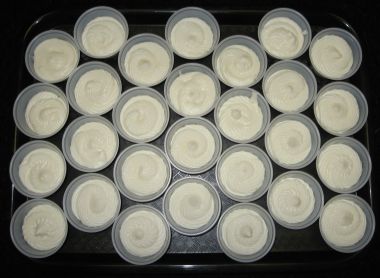
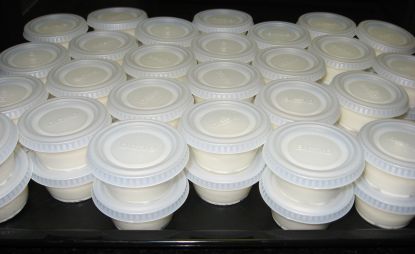
This icing can be adapted to be used for almost anything. It’s great for cakes, cupcakes and even cookies, if they don’t need to be stacked or wrapped (this icing really won’t “harden” enough for that). I made this batch of icing to go with the cookies for Girl’s school Christmas party tomorrow (see previous post – I made the cookies a few days ago and froze them). I thought that it would be easier for the kids to grab icing and decorate their own cookies if the icing was already portioned out, so I used these handy plastic portion cups. Even though they are not as environmentally friendly as I would like, I know that it will make it much easier at the party (and more hygienic), instead of having to scoop out enough icing for each kid and hoping that there will be enough left for the last kid.
Basic Buttercream Icing
1 stick (1/2 cup) butter, cut into chunky cubes
1 pound (1 box) powdered sugar (sifted, if there are any visible lumps)
1 tsp. extract of your choice
about 1/4 cup liquid of your choice
(more about extract and liquid choices later)
pinch of salt, optional
1 Tbsp. Meringue powder (I like Wilton brand, but any powdered egg whites will do. This is also optional, but does help the icing maintain it’s consistency.)
Cream butter lightly in a stand mixer until it is slightly softened and not lumpy. Add extract, meringue powder and salt, if desired. With mixer on low, pour powdered sugar in slowly until blended (mixture will be sort of coarse and crumbly). Add liquid gradually (1 Tbsp. at a time), until icing reaches the consistency that you want.
One batch makes a little more than 2 cups. You probably need a double batch of icing to frost one round two-layer cake or one batch of cookies. For a batch (24) of cupcakes, you could maybe get by with a single batch if you frost them lightly (my preference, anyway). If you are using this to frost cookies, keep in mind that the icing will stay soft, so the cookies cannot be stacked or easily stored, but it’s great for parties where the cookies will be eaten as soon as they are frosted and it’s much tastier than most typical cookie frosting.
A note on flavoring (extracts and liquids) choices:
I usually start with 1 tsp. vanilla extract and add just a touch (1/4 tsp.) of almond extract, too, but you can use any extract that you like (peppermint, lemon, etc.). For the holidays, mixing vanilla and peppermint extracts together is a festive flavor. If you want your icing to stay super WHITE, you can buy special clear extracts at a cake store or craft store. REAL vanilla extract tastes MUCH better, though, and I don’t think that having your icing stay WHITE WHITE matters, unless you’re making a wedding cake! If you really want WHITE icing, you have to use shortening, anyway, instead of the butter (ICK!). As far as liquid goes, I usually use milk, but if you want a really rich icing, you can use half-and-half or even whipping cream. If using cream, the icing will need to be refrigerated afterwards; if you use milk, the frosted cake/cupcakes can sit out for a day or two (covered) without you having to worry. If it will not be consumed before then, I would refrigerate it, just to be safe. This icing can also be easily adapted to make chocolate frosting – just add about 1/4 cup melted chocolate before adding the liquid. I usually use chocolate chips just to make it easy. To make a nice “grown-up” mocha-flavored icing, you can make chocolate icing, using strongly brewed, black coffee as your liquid in the icing, instead of milk.
Just in case any of you are wondering what I did to help with Boy’s Christmas party, it was yesterday and I was there, helping make pancakes on an electric skillet and serving them to the kids. They have been studying Jamestown and had a Colonial-themed party. They dressed in pseudo-Colonial garb (this was much more exciting to the girls than the boys), made clove-studded orange pomanders, practiced calligraphy, made yarn dolls and played Colonial games. We called the pancakes “johnny cakes”. It was very festive and fun.
What’s really funny is that Boy is now fascinated with making more yarn dolls. He put together a couple more after school today. When Girl was in 3rd grade (and they did this same EXACT party), she made lots more yarn dolls, too. She made little beds for them and experimented with creating different ways to make their hair. Boy, on the other hand, is creating elaborate yarn trapezes in his room for them to swing from to catch their little yarn adversaries. Amazing how different the genders can be, even with the same toy. When Boy was very small, I didn’t believe in these gender stereotypes and bought both of the kids little doll strollers. It seems pretty silly now, but I was convinced that he should be allowed to play with dolls, too, if he wanted to. I needn’t have bothered – he was absolutely NOT interested. Girl used her doll stroller to push her baby dolls around, lovingly covering them with teeny little blankets. Boy used his stroller, too – to make it easier to cart his toy cars around from to room.
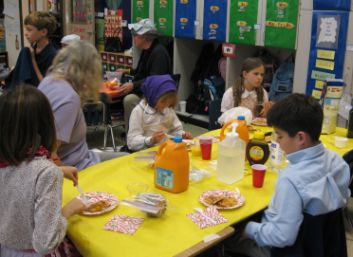
Some of Boy’s friends, eating pancakes
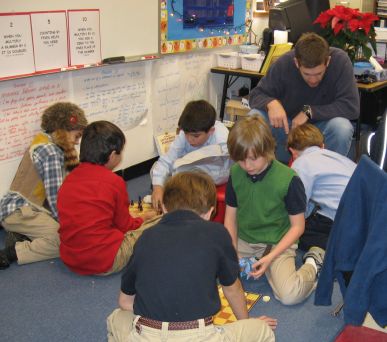
Boy (in the green sweater vest) playing “Colonial games”