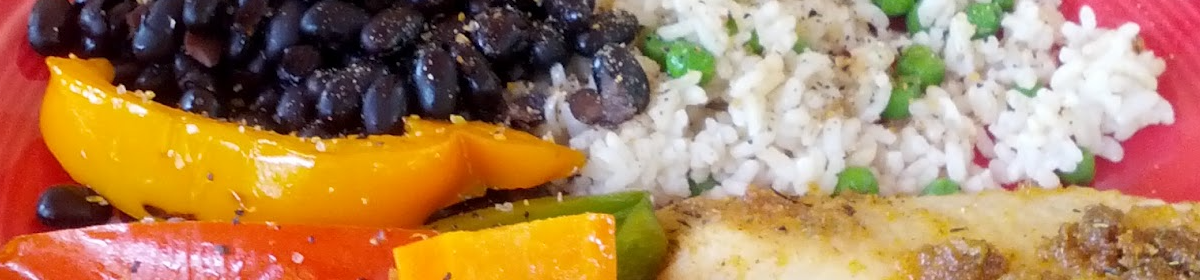
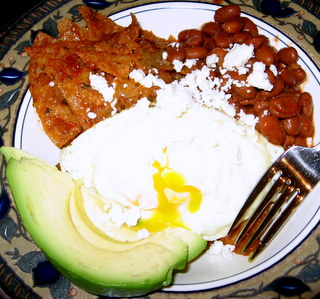
Chilaquiles with beans and avocado, topped with a fried egg
Sorry for the over-exposed photo. Click the “Simply Recipes” link all the way down at the bottom of this page for a more picturesque version of chilaquiles.
Chilaquiles
Makes 4 smallish servings or 2 very large ones
8 leftover (stale is actually better!) corn tortillas, each cut into 6 wedges
about 1 cup cooking oil
1/4 cup queso fresco, crumbled
4 eggs (or 1 egg per person that you’re planning to serve)
butter for frying the eggs
1 avocado, sliced, optional
1 1/2 to 2 cups of leftover red chile enchilada sauce (we LOVE the sauce in this recipe)
1 can beans, optional
(pinto, black or refried – any kind is fine, but these are yummy)
Heat the oil in a large, heavy skillet over medium-high heat. Fry the tortillas, in batches if necessary, until browned and crispy. Remove from oil and set aside to drain on paper towels.
Pour the oil out of the skillet. Heat the enchilada sauce over medium heat in the (now empty) skillet until warm.
In a separate skillet, fry the eggs in butter to your desired level of doneness.
While the eggs are cooking, toss in the fried tortilla wedges into the sauce and gently fold until they are lightly coated in sauce.
Portion the chilaquiles out onto serving plates (or bowls) and garnish with cheese and avocado. Place a fried egg (or two, if you’re making two servings) on top of each portion. Serve with beans alongside.
You can adapt this recipe to just about anything that you like. Feel free to incorporate cilantro, sour cream, onions, different kinds of cheese, etc. Chilaquiles are wonderful for breakfast, but are also great anytime of day or as a snack after a late night out.
Here are two other great recipes for chilaquiles variations:
Chilaquiles from Simply Recipes
Chilaquiles from Gourmet Sleuth
Month: March 2009
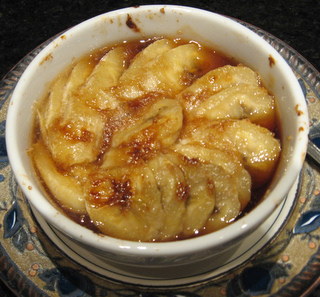
Broiled Brown Sugar-Vanilla Bananas atop Ricotta
 This recipe is from Martha Stewart’s magazine, but it’s not on her website, so I found a link here.
This was VERY easy and very tasty. All four of us really enjoyed it. I adore Bananas Foster, but Hubby has a serious rum aversion (an instance of over-indulgence in Belize MANY years ago has permanently scarred him), so I’ve never made it for the family. When I saw this recipe, I thought it might be a way to serve the kids cooked bananas without forcing Hubby to endure the rum.
Make sure that you use dishes that are wide enough; mine were a little small, so the bananas didn’t lie as flat and look as pretty as Martha’s did in the original photo, which you can barely see here:
Mine still looked OK, though, and you know what Julia Child said…”It’s so beautifully arranged on the plate, you know someone’s fingers have been all over it.”
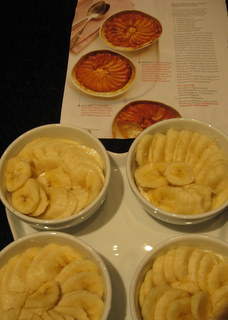
Speaking of plates, isn’t this one just the most perfect thing EVER? This came as a set, with the bowls, and is probably meant to serve condiments or snacks, but for a family of four, it can be for ANYTHING. I love Target.
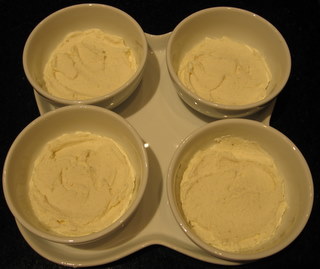
(That’s the ricotta, before I put the bananas in.)
I digress. Use the water specified in the recipe VERY sparingly. I used a bit to much and ended up with a bit of a “sauce”, rather than a crust, but it was still delicious. It also took a few minutes longer to cook in my oven than the recipe directed, so just watch it very carefully as it cooks. Quite yummy and actually fairly healthy.
Menu Planning – 13 days worth
I’ve planned two weeks at a time this time around, because we’ve got Spring Break coming up and we’ve decided to stay in town this year (really – does it make sense to leave this city during the only time of year that it’s actually pretty here? methinks not). I’m going to do lots of cooking (because when I have free time, I’d rather be doing that than anything else in the world) and we will be at home A LOT because I’m also planning on painting a few rooms in the house next week. After spending the day on the ladder, it will be nice to come down and have a good meal.
The reason that we have 13 days here, instead of 14, is that today was actually Day 1 of this little experiment. We had leftovers for dinner tonight, but I made a fabulous dessert (Hey, it’s all about priorities, people!) See the next post for details.
Also, I will round out these menus when I actually serve them. I’ll scramble some eggs and cut up some fruit for breakfast; I’ll add a green veggie at dinner, etc, but I don’t usually figure out exactly what that’s going to be until it’s time to get to work – it depends upon what I have on hand and/or what looks good at the store. I don’t usually plan lunches, because we usually eat leftovers or will have a simple soup, salad or sandwich. With all of the heavy cooking that I’m planning to do, we may not even eat lunches!
So…here goes, if you want to join in:
Disclaimer: It’s entirely possible that I may be too exhausted and sore from painting that I don’t actually get any of this done and we have pizza for 13 days straight. I’m just sayin.
Day 1
Chicken and White Bean Soup with Herb Swirl
Parmesan Toasts
Dessert:Roasted Banana Bars with Browned Butter- Pecan Frosting
Day 2
Breakfast: Buttermilk French Toast
Crispy Black Bean Tacos with Feta and Cabbage Slaw (I’ll probably sub queso freso.)
Cocktail: Micheladas
Dessert: Flaky Blood Orange Tart with Salted Caramel Sauce (finally – yes, it’s been in the freezer this whole time, but it’s tightly wrapped and I’ve checked it – it looks perfect)
Sometime today: prepare kimchi-style cabbage to eat next week (it has to sit in the fridge for a week)
Day 3
Pork Chops Oreganata
Butternut Squash Polenta
Dessert: Chocolate Malted Creme Brulee, originally from the “R.S.V.P.” column in Bon Appetit
Day 4
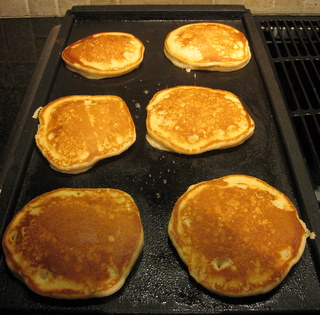
Breakfast: This will be my Amish Friendship bread “baking day”, so we’ll probably do pancakes for breakfast.
Pepperoni Bread (with assistance from the kids, hopefully. I plan to let them make their own and adapt the fillings as they choose)
Salad with Balsamic Vinaigrette
Dessert: Orange Sherbet (made with Cara Cara oranges, natch)
Day 5
Breakfast: OK, I’m ashamed to admit this, but I’m going to make…Cap’n Crunch French Toast. I knew when I saw it on the Serious Eats blog recently that I had to try it. I love the idea of breakfast cereal on French toast and it will be the first morning of Spring Break, so…forgive me, please. Actually, I already have the Cap’n Crunch in the house (it was on sale last week) and Hubby has already pulled the box out of the pantry and said “What’s the deal with this?”
Thai Noodle Salad with Sauteed Tofu
Dessert: Lemon Creme Brulee Tart (How in the world did I miss that one during my Lemon Dessert round-up?
Day 6
Breakfast: Orange Rolls (not sure if I’ll use this recipe or this one)
King Ranch Chicken Casserole (I have lots of versions and I’m still trying to figure out which one I’m going to use.)
Salad
Dessert: Ginger-Squash Cake with White Chocolate Frosting
Day 7
Summer Rolls (I have lots of versions of these, too, and will probably let the kids help make them and stuff them with whatever they like.)
Wok-fried edamame with garlic and chiles
Dessert: Lemon Ginger Cake with Pistachios
Day 8
Panuchos Yucatecos con Chorizo
salad, some version of Mexican rice
$100 pecan cookies (click on “related stories” to see the recipe…I’ll just apologize to my conservative friends now for this story…you know I love you!)
Day 9
Pan-fried Salmon with Mango-Cucumber Salsa
salad or green veggie
Dessert: Coffee Caramel Creme Brulee
Day 10
Chicken and Dumplings (some version – still deciding which one)
Espresso-Blackberry Macarons (I haven’t made these in a million years!)
Day 11
Korean Beef (still choosing between several recipes) and Kimchi-Style Cabbage (prepared previous week)
Day 12
Breakfast: The Greatest Waffle Recipe Ever (how could I not try that?)
I’m planning to watch the movie “The Big Night” on this night, hopefully to celebrate a successful (and completed!) painting job.
Italian Timpano (either this recipe or this one)
Tiramisu Affogato
Day 13
Breakfast: Yukon Gold Cinnamon Rolls
Banh Mi sandwiches (either this recipe or this one)
To my Catholic friends and family: feel free to sub out the vegetarian entrees (Thai noodle salad and summer rolls) to use on Fridays.
Amish Friendship Snack Cake
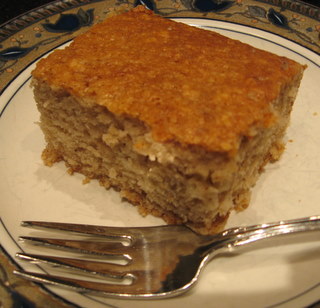
A friend recently gave me some Amish Friendship Bread starter*. I had some a long time ago, but it got tossed in one of our many moves. I was excited about the possibility of getting some sourdough going again, but I didn’t care for the cloyingly sweet recipe version that calls for instant pudding mix (ewww!) and decided to look for alternatives.
I adapted a less-sweet, lower-fat version that I found online into this tasty snack. It has a nice, yeasty, cinnamon-y flavor, without being too sweet. It would be nice for breakfast, too
Amish Friendship Snack Cake
1 cup sugar
2 cups flour
2 tsp baking powder
1/2 tsp baking soda
1/2 tsp salt
1 1/2 tsp cinnamon or (cinnamon spice blend)
1 cup Amish Friendship starter
1/3 cup applesauce
1/3 cup vegetable or canola oil
3 eggs
2 tsp vanilla or 1 1/2 tsp vanilla and 1/2 tsp McCormick Vanilla Butter & Nut extract)
Preheat oven to 350 degrees.
Grease and flour a 13 X 9 inch baking pan (or spray with nonstick spray.)
In a large mixing bowl, combine sugar, flour, baking powder, baking soda, salt and cinnamon. In a smaller mixing bowl, stir together the starter, applesauce, oil, eggs and vanilla.
Pour the liquid ingredients into the bowl of dry ingredients and gently stir until just combined. Pour the batter into the baking pan and bake for about 45 minutes, or until a toothpick inserted into the cake comes out clean. The cake will just barely be beginning to pull away from the sides of the pan and the top of the cake will be firm and evenly browned.
Allow the cake to cool completely before cutting into pieces for serving.
Great after-school snack with some fruit and a glass of milk!
*If you’re not familiar with Amish Friendship Bread starter, it’s a version of sourdough (to be honest, I’m not sure what, if anything, distinguishes it from “regular” sourdough.) The sourdough can be used to make a variety of baked goods and is ready to use every 10 days. The sourdough starter needs to be “fed” during the 10 day period prior to use (my version recommends that this be done on Day 6) by stirring in a mixture of sugar, flour and milk. Each time that you use the starter, it will grow and multiply, providing extra starter that you can pass along to your friends (with, in my experience, mixed receptions.)
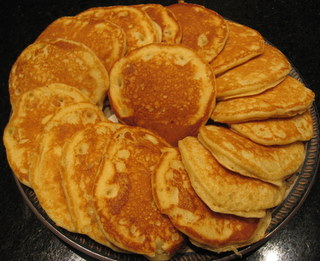
Amish Friendship Bread (Sourdough) Pancakes
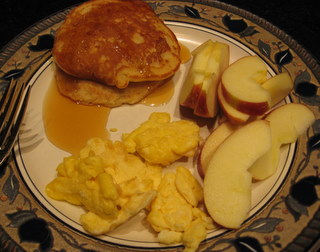
This is a GREAT Amish Friendship Bread recipe because it actually uses *2* cups of your starter (most recipes only use 1 cup), meaning that you have less leftover starter to find “homes” for at the end of your 10-day cycle. Yummy recipe AND your friends won’t run when you see them coming at you with a Ziploc bag full of a suspicious-looking substance and a sheaf of instructions detailing daily (!) babysitting instructions. Ummm….by the way, if you live in Austin and would like some starter, let me know. I would be THRILLED to share some with you!
The pancakes themselves are cakey and delicious; they smell like doughnuts as they’re cooking (because of the yeast), though they are definitely NOT overly sweet.
Amish Friendship Pancakes
Combine in a large bowl:
1 cup flour
1/2 tsp salt
1 tsp baking powder
1 tsp baking soda
Combine in a smaller bowl:
2 Tbsp oil
2 cups Amish Friendship starter
1/2 cup milk
1 egg
1 tsp vanilla extract
(or McCormick’s Vanilla Butter & Nut extract, if you can find it)
1/2 tsp Cinnamon Spice blend
Add ingredients of the smaller bowl to the ingredients of the larger bowl and whisk very gently just until blended (it’s OK if it’s still a little lumpy). Spoon batter onto a greased, preheated griddle and cook until large bubbles have completely covered the surface, then turn them over and cook until the other side is evenly browned and the pancakes are not doughy in the middle.
I use a 1/4 cup measuring cup to drop the batter onto the griddle. Made that way, this recipe will make 16 – 18 pancakes. You can add more milk to thin the batter a little if you like your pancakes thinner, but we tend to like them on the thick and fluffy side.
Smoked Salmon and Vegetable Cream Cheese Bagels

This recipe from Barefoot Contessa has gotten my last two mornings off to a lovely start. This recipe has it all: crunchy bagel (I lightly toasted mine before spreading), creamy cheese, zesty veggies, briny, chewy, smoky salmon. Seriously, this is heaven. If you like green onions, I would suggest adding a bit more than the recipe calls for. You should use the cream cheese within two days, but that shouldn’t be a problem. It would also make a great cracker spread for a snack. Don’t be scared off by the salmon, if you’re not a fan – this spread is great by itself on a bagel, too.
And…ummm…did I mention my borderline unhealthy relationship with orange supremes?
Cinnamon Chicken
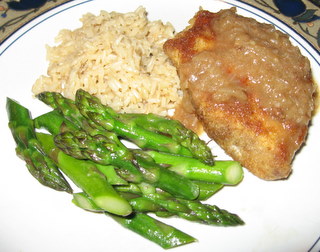
adapted from this recipe on Cooks.com
Girl is a HUGE Little House on the Prairie fan (OK, well I am, too). In some of the later episodes (the ones that we’ve been watching lately), Laura makes “Cinnamon Chicken” for her husband, Almanzo. I had never heard (aside from the show) of Cinnamon Chicken, so I decided to do some searching and see what I came up with up. This recipe looked promising, so I decided to give it a shot, but I changed it pretty significantly from the original. It turned out really well and all of us liked it quite a bit. The cinnamon flavor worked surprisingly well with chicken. The original recipe didn’t have a sauce, but when I saw all of the beautiful little browned bits in the pan, I decided that I just had to make a reduction. I mean, seriously…just look at this:
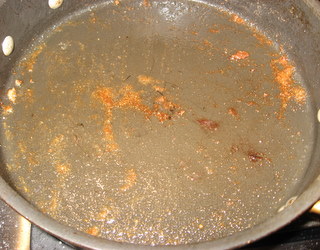
Could you pour that down the sink? Not me!
Cinnamon Chicken, inspired by Laura Ingalls Wilder
makes 2 very large or 4 small servings
For chicken:
2 large boneless, skinless chicken breasts
1/2 tsp salt
1/2 tsp freshly ground pepper (white or black – your choice)
1/4 cup flour
1/4 tsp turmeric*
1 tsp cinnamon
3 egg whites
1 cup bread crumbs
canola or olive oil (for frying)
For sauce:
1/2 of a small shallot, finely minced (2 – 3 Tbsp)
1/2 cup dry white wine
1 cup chicken stock
Cut each chicken breast into two equal pieces. Gently pound each chicken piece to an even thickness. Mix the salt, pepper and flour and spread on a plate. In a small bowl, whisk the turmeric and cinnamon into the egg whites. Dredge the chicken pieces in the flour, then dip them in the egg whites and coat them with the bread crumbs.
In a large, heavy-bottomed skillet large enough to hold the chicken pieces in a single layer, heat the oil over medium heat. Lay the pieces in the skillet and cook chicken until it is nicely browned on both sides and cooked through, turning once. Adjust heat if necessary to keep chicken from burning. Add slightly more oil, if necessary.
When chicken is done, remove it from the skillet (reserve oil and crusty bits in the skillet) and set aside. If there is a lot of oil in the skillet, pour it off until you are left with about 2 tsp. Re-heat skillet over medium-high heat. Add shallots and cook 2 – 3 minutes until softened. Carefully add the wine and simmer, whisking to incorporate the browned bits in the bottom of the pan, until the mixture is very thick and almost all of the wine has bubbled away. Add stock and simmer, whisking occasionally, until the sauce has thickened to the desired consistency. Pour over chicken or serve on the side.
*It’s worth the extra effort to find the turmeric, if you don’t already have some in your spice cabinet. It adds a little spicy flavor to this dish (without adding “heat”) to balance the flavors and keep the chicken from being too cinnamon-y sweet. Turmeric can be used in lots of other Indian and Mexican dishes and has been credited in a recent UCLA study with possibly helping to prevent amyloid plaques in the brain (which have been tied to Alzheimer’s Disease.)
Lemon Custard – Pine Nut Cake
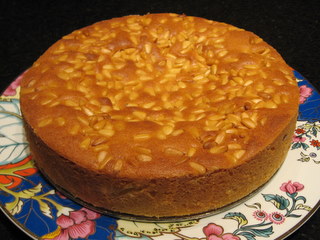
adapted from a Betty Crocker recipe
Lemon Custard:
1/4 cup granulated sugar
2 Tbsp cornstarch
3/4 cup cold water
3 egg yolks
1 Tbsp grated lemon zest
3 Tbsp lemon juice
Cake:
1 cup unsalted butter, softened
1 cup granulated sugar
5 eggs
1 3/4 cups all-purpose flour
2 tsp grated lemon zest
1 1/2 tsp baking powder
1 tsp vanilla
1/3 cup pine nuts, lightly toasted
(250 degrees for 2 to 3 minutes – watch them VERY carefully to prevent burning)
Two possible garnish options:
a sprinkle of powdered sugar
OR
Make a glaze of 4 Tbsp lemon juice and enough powdered sugar to make a drizzling consistency (about 1 cup). Drizzle over cake, using a fork. Sprinkle each glazed cake slice with a tiny bit more grated lemon zest.
1. In small, heavy saucepan, whisk together 1/4 cup of the granulated sugar and the cornstarch. Stir in water and egg yolks with a wire whisk until well mixed and no lumps remain. Heat to boiling over medium heat, stirring constantly, until mixture begins to thicken. Cook and stir 1 minute, remove from heat. Stir in 1 Tbsp lemon zest and the lemon juice. Refrigerate, uncovered, 20 minutes, stirring once, until room temperature.
2. Heat oven to 350 degrees. Grease bottom and side of a 9-inch springform pan with butter; lightly flour. In large bowl, beat butter and 1 cup granulated sugar with electric mixer on medium speed about 1 minute or until smooth.
3. Beat in eggs, one at a time, until just blended, then continue beating on medium speed 2 minutes, scraping bowl once. On low speed, beat in flour, 2 tsp lemon zest, the baking powder and vanilla about 30 seconds or until just blended.
4. Spread half of cake batter (about 2 cups) in bottom of pan. Spoon custard evenly onto batter, spreading to 1/2 inch of edge. Drop remaining batter by tablespoonfuls around edge of custard and pan. Spread batter evenly and toward center to cover custard. Sprinkle pine nuts over top.
5. Bake 45 to 55 minutes or until center is set, cake is firm to the touch and top is golden brown. Cool in pan on wire rack at least 1 hour (center will sink slightly). Run think knife around side of cake; remove side of pan. Sprinkle with powdered sugar before serving. Serve warm or cool. Store covered in refrigerator.
Makes 12 servings.

Semolina Egg Noodles with Smoked Ham, Asparagus, Onions and Garlic
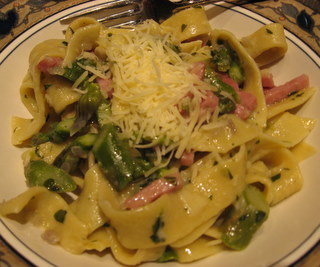
We had to add a bit of parmesan to the finished dish…
This recipe is from one of Ruth Reichl’s autobiographical books (I can’t remember which one, but they’re all wonderful), but I can’t find a link to it anywhere, so I’m posting it here. This recipe was very yummy. The noodles were rich and chewy and velvety, but I think that I didn’t roll the dough out thinly enough, because they were pretty “beefy”, as far as pasta goes. I was afraid that the noodles would fall apart when cooked if I made them too thin, but the dough is VERY sturdy because of all of the egg yolks. If I make these again, I will probably use this recipe for the pasta, instead, just to cut down a bit on the richness (and cholesterol!) If you really wanted to simplify this, you could just use store-bought pasta, instead of making your own, although making your own is quite simple.
Charlene Rollins’ Semolina Egg Noodles with Smoked Ham, Asparagus, Onions and Garlic
For the pasta:
2 cups all-purpose flour
1/2 cup semolina flour, plus additional for dusting
1/2 tsp salt
18 large egg yolks
3 Tbsp olive oil
For the sauce:
1 large red onion, chopped
salt and pepper
1 stick (1/2 cup) unsalted butter
2 Tbsp finely chopped garlic
¼ cup finely chopped flat-leaf parsley leaves
½ cup water
¾ pound sliced smoked ham, cut into 1- by 1/4-inch strips
1 pound medium asparagus spears, trimmed and cut diagonally into 1/2 -inch long pieces
To make the pasta:
Pulse the flours and salt together in a food processor. Add the egg yolks and oil and process just until mixture forms a ball of dough. Divide the dough into 6 pieces and form each into a disk. Wrap each disk of dough in plastic wrap and let stand at room temperature for 1 hour.
Dust 3 baking sheets with some semolina flour.
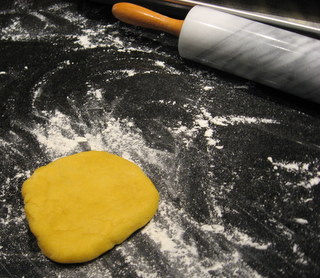
Rolling out one of the six dough “disks”
Unwrap 1 piece of dough and roll it out on a lightly floured surface with a floured rolling pin until paper thin, making a rectangle about 11 by 13 inches. Cut the dough crosswise with a pizza wheel or sharp knife into 11- by ½ inch wide strips.
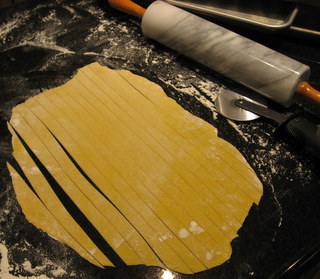
Cutting the dough into noodle strips
If the “edge noodles” bother you, you can discard them.
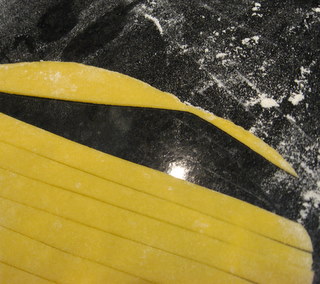
Carefully transfer the pasta, overlapping strips slightly, to a sheet pan to dry at room temperature, gently turning occasionally, for about 2 hours.
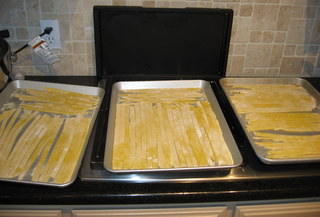
Noodles, drying for 2 hours.
Repeat the rolling and cutting with the remaining dough.
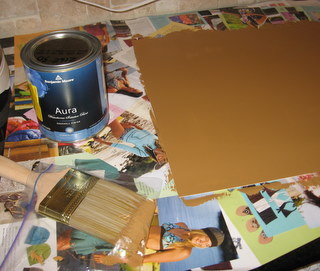
While the noodles dry, feel free to paint some posterboards (on the other side of the kitchen, well away from the noodles) to test out a new kitchen wall color.
To make the sauce:
Cook the onion, with salt and pepper, in 4 Tbsp of butter in a heavy skillet over moderate heat, stirring, until softened. Add the garlic and parsley and cook, stirring, for 2 minutes. Cover and keep warm.
Combine the water, ham, asparagus and remaining 4 Tbsp of butter in a large, heavy saucepan and simmer, covered, until the asparagus is crisp-tender, about 2 minutes. Stir in the onion mixture and season with more salt and pepper. Keep sauce warm, covered.
To assemble the dish:
Cook the pasta in an 8-quart pot half full of boiling salted water until just tender, about 1 minute, and drain in a colander. Return the pasta to the pot, add the sauce, and toss to combine. Season with salt and pepper.
Serves 4 to 6.

This is the last lemon post, I promise…
Some of the desserts in my lemon dessert round-up specified Meyer lemons, so I wanted to briefly describe the difference between them and a regular lemon. Meyer lemons taste sweeter and fruitier than “regular” lemons. They are larger and they have edible skin. You can substitute regular lemons when Meyer lemons are called for in a recipe, but the result will be tangier and not quite as sweet. In recipes that call for a lot of Meyer lemon juice, you can substitute 3 parts regular lemon juice and one part Mandarin (clementine) orange juice. Peak Meyer lemon season is over the winter, but depending upon where you live, they can sometimes be found into the Spring. For more information and great ideas on how to use Meyer lemons (if you can get your hands on them!), check out this wonderful article from the Los Angeles Times.
And…one LAST lemon-crazy note:
If you’re in a “lemony” mood, but don’t feel like baking, this Sugar Lemon body lotion from Sephora is amazing. I can’t do it justice, but check out what Dooce has to say about it here.